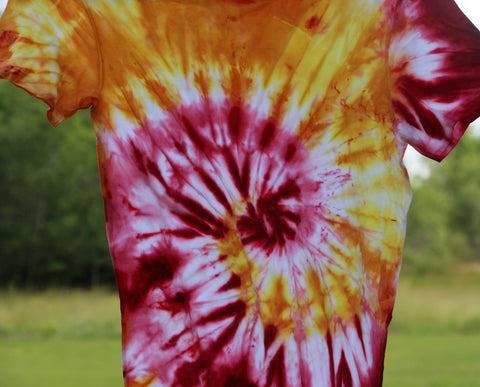
Easy Spiral Tie Dye
The warm weather is a great time to experiment & create new tie dye projects. You don't need to be a master dyer to make bullseye, spiral, stripe, heart or folded designs. All you need to do is understand basic tie dye concepts to make new shapes. Once you get comfortable it is easy to try more advanced patterns.
You can get great results using primary colours (red, yellow or blue) since they combine to make secondary colours (orange, green and purple). The great thing about tie dyeing is that you control the pattern. If you add more string or elastic you will have more base or original fabric colour showing through. You can have wide spaces of base by adding thicker string or you can have narrow lines.
The spiral design will look great on a T-shirt, bodysuit or even a onesie.
-
Start with clean, damp fabric and prepare dye solution as usual.
-
Decide where your spiral centre is (mark it or simply eyeball the general area). Pinch or gather fabric and twist into a spiral shape.
-
Secure spiral with string or large rubber bands to create wedges (or sections) for your design (rubber bands or string create colour divisions that will show the original colour of fabric).
-
Dye fabric: use a squirt bottle or dip dye into dye bath, make sure to flip over spiral for other side (try alternating primary, secondary or complementary colours or any other combination).
-
Cover dye with plastic wrap and set aside for a few hours or overnight to set.
-
Rinse fabric until water runs clear. Wash and dry fabric as usual, you may also set design with a warm iron if preferred.
Colour Splash Blog Related Posts
-
Dyed Paper Garland Tree Decoration
We DIY-ed a standard white paper garland from a craft sto...
-
Holiday Crafts and Decorations
How would you like to add a pop of bold red to holiday gi...


