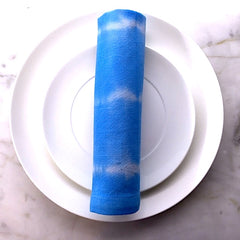
Striped Tie-Dye Napkin Project

Hand dyeing stripes is one of the 5 simple tie dye techniques that everyone should try. The blue and white stripes look great with white plates. Use the royal blue napkin as an accent for a bright table setting anytime of the year.
Materials:
- Royal Blue Tintex Fabric Dye
- White cotton napkin
- Elastic bands
- Measuring cup
- Bowl (ex: stainless steal, plastic container etc.)
- Spoons
- Scissors
- Plastic wrap
Directions:
PLAN DESIGN BEFORE DYEING:- Optional: mark amount of stripes on paper before dyeing.
- If needed: mark beginning & end of each stripe lightly on fabric edge of wrong side of napkin (ex: use ruler & pencil/chalk).
- Use paper stripe pattern as reference or mark & join dots on fabric edge with elastics.
- Tightly wrap all elastics at even intervals on the damp napkin.
- The closer together elastics are, the more stripes you will have. Elastic bands resist dye and must be secured tightly for stripes to be noticeable.
- Wear rubber gloves and protect work area with plastic.
- Heat 2 cups of water with a kettle and completely dissolve dye powder (ex: use a large measuring cup or small bowl). Darker colours use double the usual amount of Tintex per fabric weight.
- Pour prepared hot dye solution into a larger dye bath filled with hot water from the kettle (ex: large stainless steel bowl or sink).
- Keep fabric in dye bath for 30 minutes up to 1 hour. Adjust time as needed for the intensity you desire (colour is darker when fabric is wet).
Optional: Gently wrap fabric in plastic and set aside for a few hours or overnight. Remove plastic, rinse fabric in the sink until water runs clear.
REMOVE ELASTICS:
- Remove elastic bands with scissors and rinse fabric again until water runs clear.
- Hand wash and air-dry.


