Thanksgiving Tablescape Dyeing Project
Fall colours are warm and rich or bright and cheery, they look festive used in a holiday table setting. There are so many ways to customize the perfect tablescape using: napkins, placemats, tablecloths, fabric runners or even dyed-cord coasters. Thanksgiving is always the start of the holiday season, so use these easy home decor dyeing & styling ideas to create a festive atmosphere for family and friends.
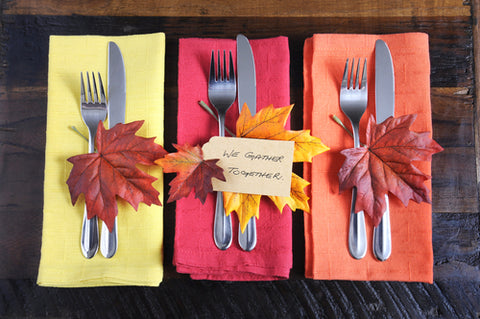
The easiest DIY ever is to do a single colour dyeing project; just choose the colour you want to dye and put all of your material in the dye bath. You can simply add a pop of colour to regular white linen, cotton or hemp napkins (try Tangerine Orange, Cardinal Red or Brilliant Yellow fabric dyes). More adventurous dyers can mix a 2-3 colours together or try tie dye, ombre techniques. It's also fun to stamp, spray or paint designs on the fabric too...for a personal touch your guests will love.
DYED BURLAP THANKSGIVING NAPKIN HOLDERS
Add a touch of country chic to you holiday tablescape with custom burlap flowered napkin rings; use them to add more colour to your dyed napkins. Layer with placemats, tablecloths and runners for a colourful thanksgiving holiday table.
Materials Needed:

- Tintex fabric dye
- Plastic cover to protect workspace
- Rubber gloves
- Tablespoon
- Measuring cup
- Kettle or microwave
- Bowl (stainless steel, glass, plastic etc.)
- Burlap flowers
- Paper towel (optional)
- Glue gun & glue (optional)
- needle & thread (optional)
Directions:
- Protect work area with plastic and wear gloves to avoid staining hands.
- Boil water in a kettle and set aside for 10 minutes or until water has cooled slightly. Water can also be heated up in a microwave for 1-2 minutes in a microwave safe container
- Mix 1 cup hot water with 1 tablespoon (or more) of Tintex Fabric Dye so it is completely dissolved. Create a custom shade by mixing different amounts of 2-3 colours together. Brighter or darker colours will use more dye; pastels will use less dye. Get creative and experiment with different intensities.
- Test dye colour on a paper towel.
- Place burlap flowers in the dye bath and make sure they are completely covered.
- Stir if necessary occasionally and check frequently to ensure that desired colour is achieved.
- Lay flowers on plastic cover to air dry.
- Clean work area with soap and water or bleach.
- Use a glue gun to add the flowers to a napkin ring or sew onto ribbon with a needle and thread.


