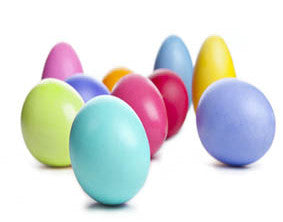
Make Pastel Spring Eggs
Decorated eggs are a cute addition to a spring tablescape and only need a small amount of tintex. You can easily make pastels or bright colours depending on how much dye is used or how long they are in the dye solution. Please note that these Easter eggs are for display only.
 Materials:
- Eggs that have been 'blown out' (optional)
- Faux or decorative eggs made of: paper, nylon or styrofoam
- Tintex dye of choice
- Wax paper or plastic drying cover
- Plate
- Spoon(s)
- Dyeing containers (large enough to hold 3 cups of water
- Optional: paintbrush or sponge brush
- Optional: painters tape or scotch tape
- Optional: Elastic bands or string
Directions:
- Protect workstation with plastic to prevent staining; wear rubber or plastic gloves to protect skin.
- Prepare dye solution. Thoroughly dissolve Tintex powder with 2 cups (500ml) of hot water (avoid breathing dust, use with adequate ventilation).
- Prepare egg with tape, stickers, elastic bands that will be removed after dyeing for a negative-space effect (that will allow the base egg colour show through).
- Place egg on a tablespoon and dip it into the prepared dye bath (either fully submerge or partially dip).
- Keep the egg submerged for approximately 30 seconds or longer for darker or more vibrant results.
- Remove egg, place gently on a plate with raised rims covered with wax paper or plastic.
- Clean work area up as usual to avoid stains.
- Allow egg to dry for 1 hour; remove stickers, tape or elastic bands when dye is completely dry.
- Place gently into an Easter themed basket, bowels or glass vases for display.
Tintex Fabric Dye eggs are not suitable for eating.
Colour Splash Blog Related Posts
-
Dyed Paper Garland Tree Decoration
We DIY-ed a standard white paper garland from a craft sto...
-
Holiday Crafts and Decorations
How would you like to add a pop of bold red to holiday gi...


